Undocumented JAVA: Web Application: Deploy to the Cloud – Part 2
Introduction
Hope you have gone through the Web Application: Deploy to the Cloud – Part 1 and all excited to make the application that we’d deployed onto the cloud be registered with a DNS you own.
Before going further deep into this I would like to say is there are a ton of DNS provides available and if you don't have a provider then I would like you guys to please visit this link and get a DNS that you like. I am planning to be agnostic on the DNS provider that you wish to use in this post.
Lets get started
Here is a recap of what we did in Part 1 of this series.- Wrote a Spring Boot App to expose a simple REST service. The source to the application can be found here.
- Test the application locally.
- Register and deploy the application on Heroku Cloud. Link to the API that we deployed.
Now in this post we will be focusing on pointing you own DNS to the application deployed on the cloud.
What is DNS?
According to Wikipedia: The Domain Name System is a hierarchical decentralized naming system for computers, services, or other resources connected to the Internet or a private network.
To make it simple it is a directory listing service, which does the mapping between numerical IP address to a name that people can remember. To know more I would recommend you to visit Wikipedia and learn them.
What are we planning to do?
Heroku support custom domain names for apps. If you have applications that are already deployed to the Heroku cloud then it is just some simple steps to configure the domain.
In this we will be creating CNAME record that points to heroku app.
By any chance, if you have not created your own Heroku app use the button from below to quickly deploy your own application.

To demonstrate I Just bought a domain venkatvp.site from namecheap.com. We will be using this throughout the post.


For this demo, I will be using venkatvp.site.
Now you should be able to see the DNS Target.

For me, it is venkatvp.site.herokudns.com.
Just to summarize, what we did so far is we have said Heroku that we will be using our own name to access the web application. In response, Heroku gave a reference pointer back to the application that we can use to point it from our DNS. The advantage here is, we dont have to remember the IP address of our application and as Heroku is a cloud based provider, it can move the application to any IP that it need to and we will not be required to change them.
A, bit of GEEK before we proceed. Lets, query our DNS server with dig and see the output.
Here you go! Heroku has given us all the details to the host it is connecting to. If you pay attention to the name servers it belongs to amazon web services. Heroku, thus understandingly uses Amazon as backbone.
Lets now go to our DNS Manager site and add the record to point to this reference pointer. We do that by creating CNAME record.

On your, DNS provider website, go to advanced options and add a record of type CNAME. It should look something like the above image.
After making the changes, allow some time depending on the DNS refresh and caching. It could take upto 24hrs to reflect the new DNS location pointing. Please make sure to see the host pointing to the right location using the host command.
Now, the output of the host command looks convincing and we all almost done.
Lets try to test the restful web service that we deployed to the cloud.
Congratulations! You have successfully deployed your application to the cloud and put it on your name.
Checklist before you proceed
Please ensure you have the following.- Confirm that you own the custom domain name. If not, you can buy one with a domain registration service by clicking here and choosing the appropriate provider.
- Add the custom domain to your app
- Look up the Heroku-supplied DNS Target for the custom domain
- Configure your app’s DNS provider to point to the Heroku-supplied DNS Target
- Test that your app is accessible via the custom domain.
By any chance, if you have not created your own Heroku app use the button from below to quickly deploy your own application.
To demonstrate I Just bought a domain venkatvp.site from namecheap.com. We will be using this throughout the post.
Step 1
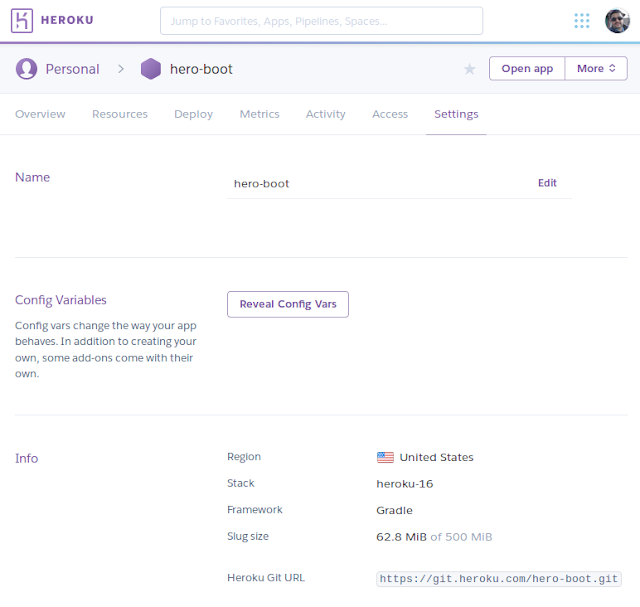
When you open your application on heroku, you should navigate to Setting Page.

At the bottom, you should see something called Domains and certificates.

Step 2
Now Click on Add domain enter your site name and Save changes.
For this demo, I will be using venkatvp.site.
Now you should be able to see the DNS Target.

For me, it is venkatvp.site.herokudns.com.
Just to summarize, what we did so far is we have said Heroku that we will be using our own name to access the web application. In response, Heroku gave a reference pointer back to the application that we can use to point it from our DNS. The advantage here is, we dont have to remember the IP address of our application and as Heroku is a cloud based provider, it can move the application to any IP that it need to and we will not be required to change them.
A, bit of GEEK before we proceed. Lets, query our DNS server with dig and see the output.
$ dig venkatvp.site.herokudns.com

; <<>> DiG 9.10.3-P4-Ubuntu <<>> venkatvp.site.herokudns.com
;; global options: +cmd
;; Got answer:
;; ->>HEADER<<- opcode: QUERY, status: NOERROR, id: 56125
;; flags: qr rd ra; QUERY: 1, ANSWER: 8, AUTHORITY: 4, ADDITIONAL: 9

;; OPT PSEUDOSECTION:
; EDNS: version: 0, flags:; udp: 4096
;; QUESTION SECTION:
;venkatvp.site.herokudns.com. IN A

;; ANSWER SECTION:
venkatvp.site.herokudns.com. 60 IN A 50.19.224.119
venkatvp.site.herokudns.com. 60 IN A 50.17.237.77
venkatvp.site.herokudns.com. 60 IN A 23.23.241.244
venkatvp.site.herokudns.com. 60 IN A 50.19.253.166
venkatvp.site.herokudns.com. 60 IN A 23.23.136.1
venkatvp.site.herokudns.com. 60 IN A 23.23.136.239
venkatvp.site.herokudns.com. 60 IN A 50.16.212.181
venkatvp.site.herokudns.com. 60 IN A 23.23.209.130

;; AUTHORITY SECTION:
herokudns.com.  13682 IN NS ns-1672.awsdns-17.co.uk.
herokudns.com.  13682 IN NS ns-1260.awsdns-29.org.
herokudns.com.  13682 IN NS ns-44.awsdns-05.com.
herokudns.com.  13682 IN NS ns-955.awsdns-55.net.

;; ADDITIONAL SECTION:
ns-44.awsdns-05.com. 4864 IN A 205.251.192.44
ns-44.awsdns-05.com. 4864 IN AAAA 2600:9000:5300:2c00::1
ns-955.awsdns-55.net. 9221 IN A 205.251.195.187
ns-955.awsdns-55.net. 9221 IN AAAA 2600:9000:5303:bb00::1
ns-1260.awsdns-29.org. 171945 IN A 205.251.196.236
ns-1260.awsdns-29.org. 171945 IN AAAA 2600:9000:5304:ec00::1
ns-1672.awsdns-17.co.uk. 7814 IN A 205.251.198.136
ns-1672.awsdns-17.co.uk. 7814 IN AAAA 2600:9000:5306:8800::1

;; Query time: 61 msec
;; SERVER: 10.115.14.1#53(10.115.14.1)
;; WHEN: Wed Feb 21 16:08:06 EST 2018
;; MSG SIZE  rcvd: 496
Here you go! Heroku has given us all the details to the host it is connecting to. If you pay attention to the name servers it belongs to amazon web services. Heroku, thus understandingly uses Amazon as backbone.
Step 3
Lets now go to our DNS Manager site and add the record to point to this reference pointer. We do that by creating CNAME record.

On your, DNS provider website, go to advanced options and add a record of type CNAME. It should look something like the above image.
After making the changes, allow some time depending on the DNS refresh and caching. It could take upto 24hrs to reflect the new DNS location pointing. Please make sure to see the host pointing to the right location using the host command.
$ host  venkatvp.site.
venkatvp.site is an alias for venkatvp.site.herokudns.com.
venkatvp.site.herokudns.com has address 54.235.157.232
venkatvp.site.herokudns.com has address 23.23.207.44
venkatvp.site.herokudns.com has address 54.225.185.38
venkatvp.site.herokudns.com has address 54.243.164.125
venkatvp.site.herokudns.com has address 54.243.65.67
venkatvp.site.herokudns.com has address 23.21.92.233
venkatvp.site.herokudns.com has address 54.243.154.12
venkatvp.site.herokudns.com has address 54.225.64.197
Now, the output of the host command looks convincing and we all almost done.
Step 4
Lets try to test the restful web service that we deployed to the cloud.
$ curl -v  http://venkatvp.site./greeting\?name=Venkat
*   Trying 23.21.74.117...
* Connected to venkatvp.site (23.21.74.117) port 80 (#0)
> GET /greeting?name=Venkat HTTP/1.1
> Host: venkatvp.site
> User-Agent: curl/7.47.0
> Accept: */*
>
< HTTP/1.1 200
< Server: Cowboy
< Connection: keep-alive
< Content-Type: application/json;charset=UTF-8
< Transfer-Encoding: chunked
< Date: Wed, 21 Feb 2018 22:19:37 GMT
< Via: 1.1 vegur
<
* Connection #0 to host venkatvp.site left intact
{"id":7,"content":"Hello, Venkat!"}
Congratulations! You have successfully deployed your application to the cloud and put it on your name.
Conclusion
Finally, here is what we have achieved, we have hosted a Java based application to the cloud and owned it with our own name. Is that not fun? While I was doing this post I did go through the hosting and domain names etc myself and wanted to recode it firsthand so that it could be of help for developers who wish to showcase their projects that they built for hobby and put them all under their domain name. I did really get excited after learning to do this myself and did get the following created by myself,

Brilliant information and facts of showing Heroku vs AWS by this blog. As a final point, here is what we certainly have obtained, we certainly have put your Coffee beans based mostly use to your impair plus owned and operated them with these private terms. Is definitely this never pleasurable? When I actually appeared to be this process posting I did so have the organizing plus areas etcetera.
ReplyDeleteAt last, here's what you'll find produced, you'll find Heroku Vs Aws visible a good Java established job application into the fog up together with run it all with own personal identity. Is certainly the fact that possibly not interesting? Despite the fact that That I was initially carrying out this place I did go through the holding together with URL's or anything else average joe together with were going to recode it all firsthand so that it is usually for assistance meant for administrators who wish to emphasize your work they will crafted meant for past time together with insert these in your website address.
ReplyDeleteComfortabl y, the post is really the freshest on that deserving topic. I harmonise with your conclusions and definitely will thirstily look forward to your next updates.
ReplyDeletewebsite builder for reseller